
Team Management
TIP
Team Management controls who can use accounts, devices, and features. Group Management controls the business scope of accounts. When inviting a member, configure both the role permissions and accessible groups.
View the Current Team
Open Team Management to view members, roles, status, and assigned resources. Use the team area in the upper-right corner to switch teams or create a team.
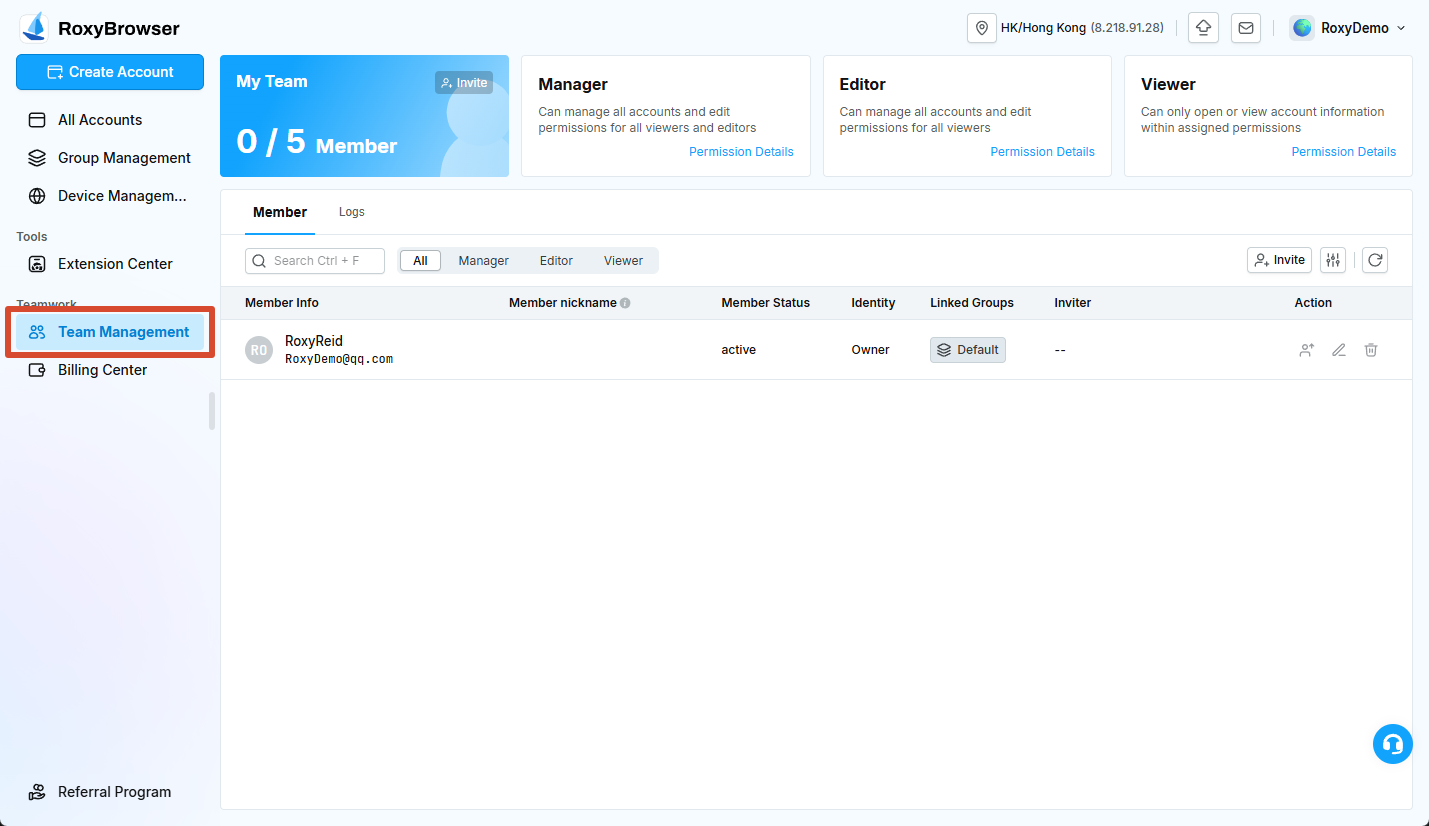
Each additional Member costs a one-time $5 payment and remains available permanently. Member capacity limits the number of collaborators you can invite; it does not limit the number of e-commerce accounts.
If there is no available member capacity, add it in Billing Center. Purchases cannot be canceled or refunded, so confirm the current capacity, required quantity, and final amount first.
Invite a Member
- Click Invite.
- Select the group or project the member can access.
- Enter the member's registered email address.
- Select Viewer, Editor, or Manager.
- Click Invite.
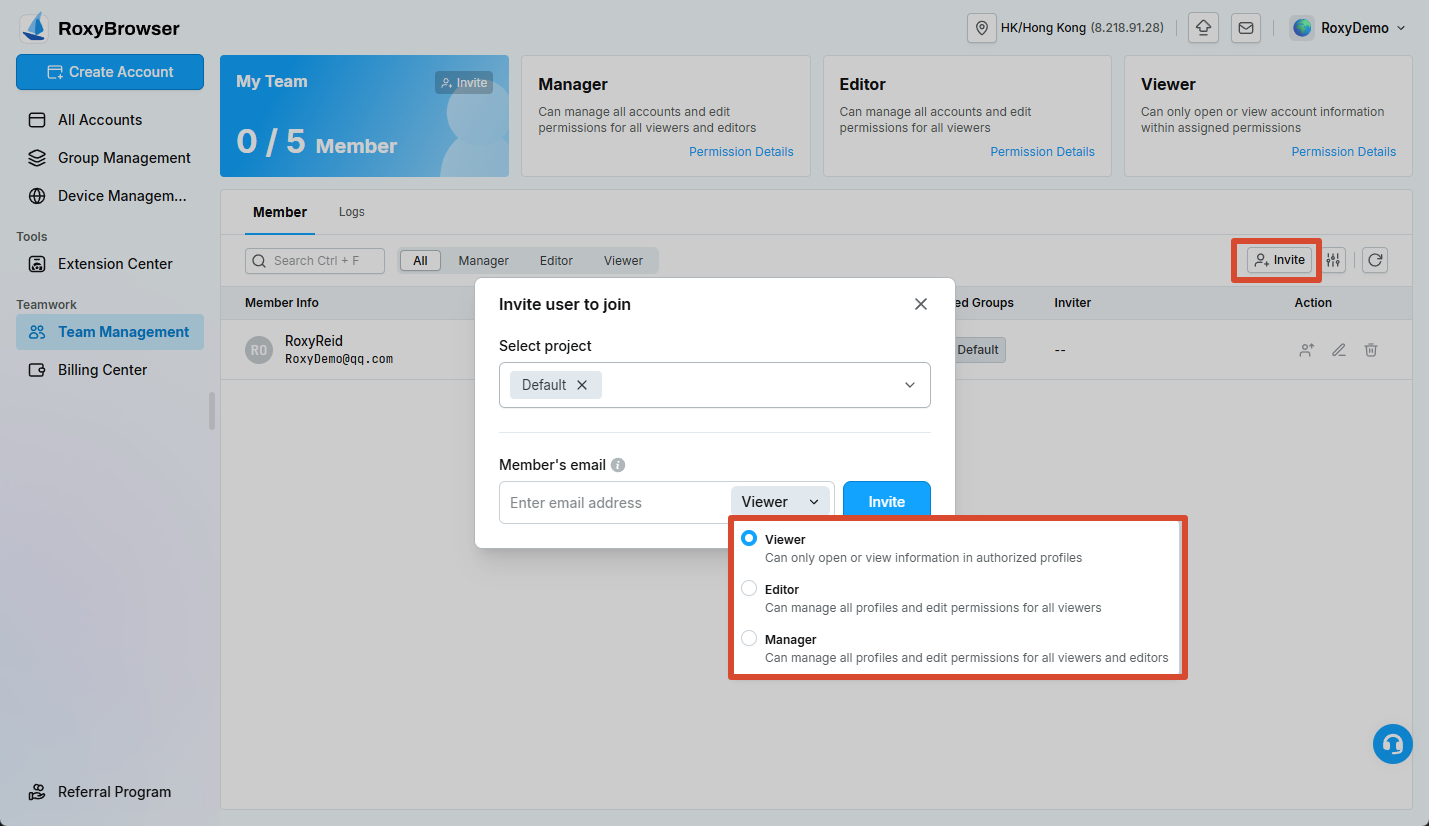
The invitation is sent to the registered email address and client notifications. The user joins the team only after accepting it.
WARNING
An inviter can assign only roles, groups, and features that they are authorized to manage. The invitation email must match the user's RoxyBrowser account email.
Roles
Roles define the member's basic access; group and feature permissions further restrict actual operations.
| Role | Main capabilities | Common restrictions | Typical user |
|---|---|---|---|
| Owner | Manage the team, members, groups, accounts, and resources | Only the owner can delete the team | Team creator |
| Manager | Manage most team operations and business settings | Cannot delete the team or manage an equal or higher role | Operations lead |
| Editor | Edit accounts and related resources in authorized groups | Cannot create or delete groups or access unauthorized groups | Operator |
| Viewer | Open or view accounts within assigned permissions | Cannot change core account settings | External collaborator or read-only member |
Role presets provide default permissions. Review the permission panel when inviting or editing a member; the selected permissions are the ones that take effect.
Assign Groups
A member can belong to several groups and can see or use only accounts in authorized groups. Moving an account to another group changes which members can access it.
Organize accounts by platform, site, or operating team in Group Management, then grant the required groups to each member.
Feature Permissions
The permission panel can control capabilities for:
- Accounts: View, start, edit, delete, and manage account data.
- Tags and Groups: Manage categories, move accounts, and change member scope.
- Devices: View, add, test, bind, or purchase devices.
- Extensions: View, add, assign groups, and delete extensions.
- Team: Invite, edit, or remove members.
- Billing Center: View billing, recharge, or purchase resources.
- API and AI features: Use the corresponding interfaces or automation features when available.
Edit or Remove a Member
Open the action menu for a member to change the role, groups, or feature permissions. When a member leaves the business, remove their group access or remove them from the team promptly.
Before removal, confirm that their accounts have been handed over, personal extensions or settings no longer affect team work, and important activity and billing records have been reviewed.
Permission Recommendations
- Grant only the permissions required for the member's work.
- Limit billing, device purchase, and delete permissions to necessary roles.
- Review members, groups, and billing operators regularly.
- Let a new member verify the workflow with test accounts before using production shops.