Quick Account Creation
TIP
In E-commerce Mode, an account is an independent browser environment that stores a shop login session, device network, and fingerprint settings. You can create unlimited accounts. Before an account can be started for the first time, it must be bound to a device.
Step 1: Create an Account
In E-commerce Mode, click Create Account in the upper-left corner and complete Basic Info:
- E-commerce Platform (required): Select the platform type, platform, and country or region. If the platform is not listed, select a custom platform and enter its URL.
- Account Name (required): A name used to identify the account in the list. Include the platform, site, or operator when helpful.
- Login Account / Login Password: Optional fields for recording the platform credentials.
- Bind Device: Optional during creation. You can select an existing device now or bind one later.
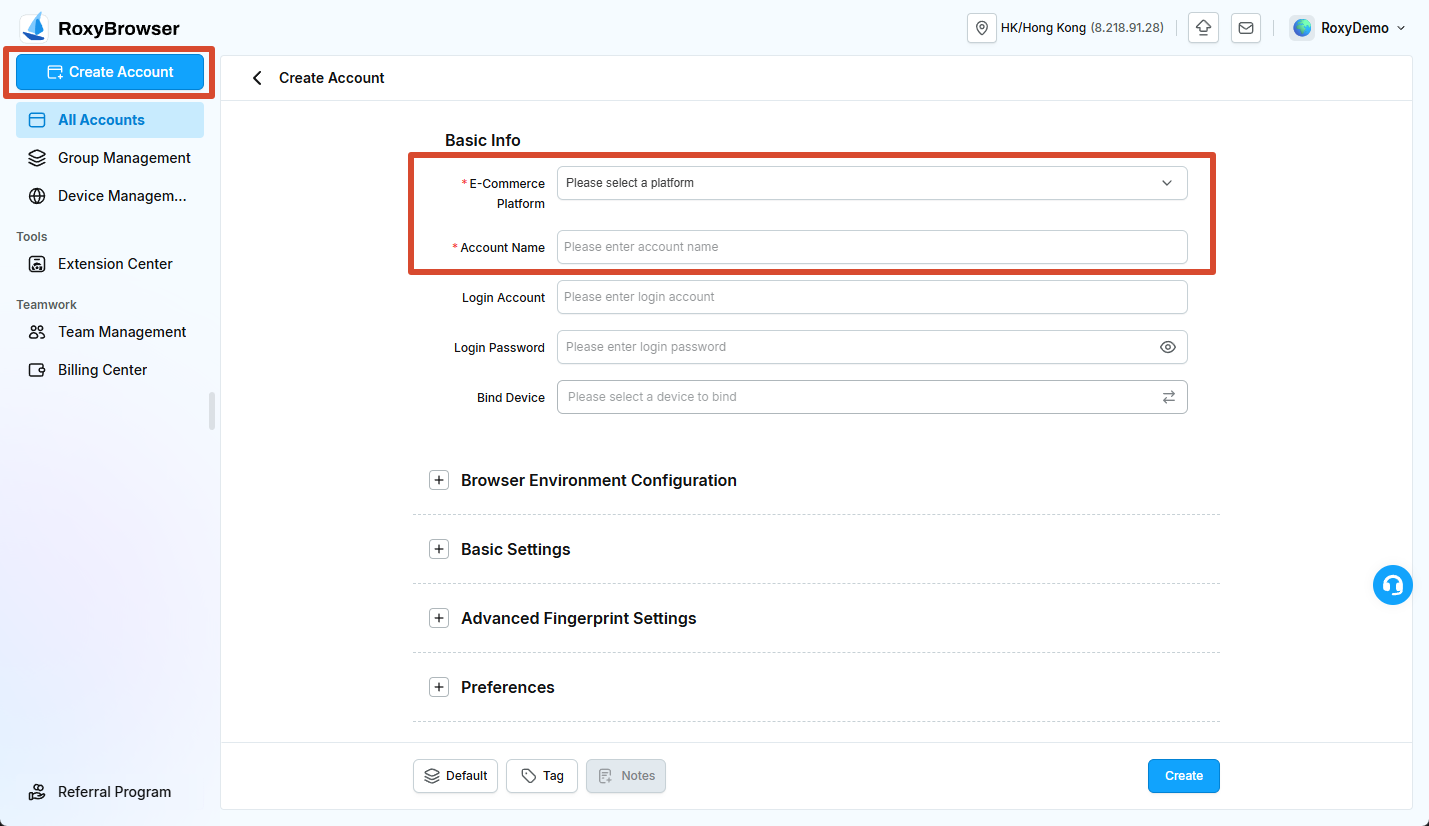
At the bottom of the page, you can also select a group and add tags and notes. Review the information, then click Create.
Step 2: Review the Environment Configuration
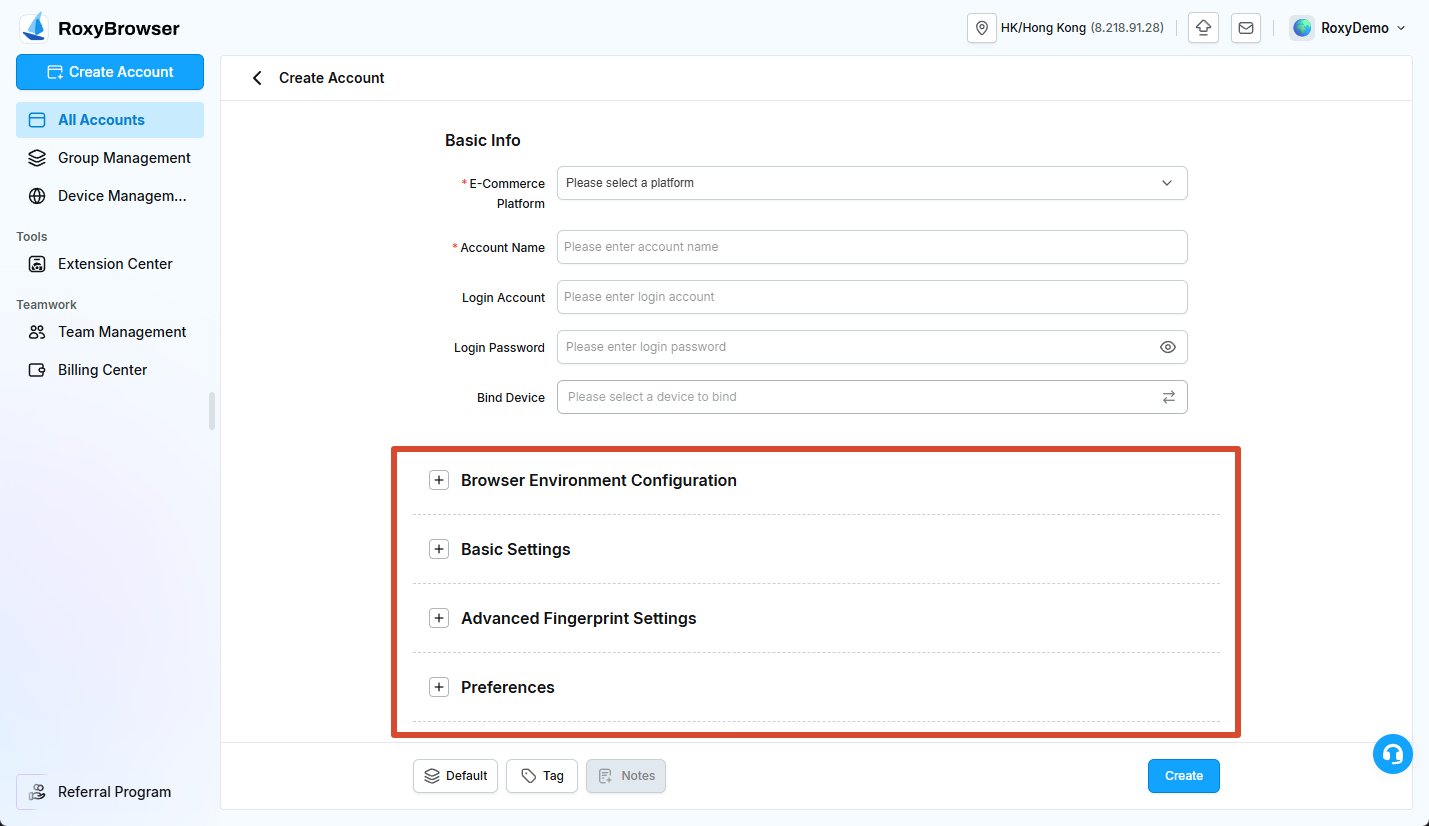
Browser Environment Configuration, Basic Settings, Advanced Fingerprint Settings, and Preferences all have default values.
For a first account, you can normally keep the defaults. Change the system, kernel, language, time zone, or fingerprint values only when the target platform has a specific requirement. See Account Management and Configuration for field details.
Step 3: Bind a Device
A device provides the account's outbound IP. An account can be created and edited without a device, but it cannot be started.
After creation, find the account under All Accounts and click Bind Device.
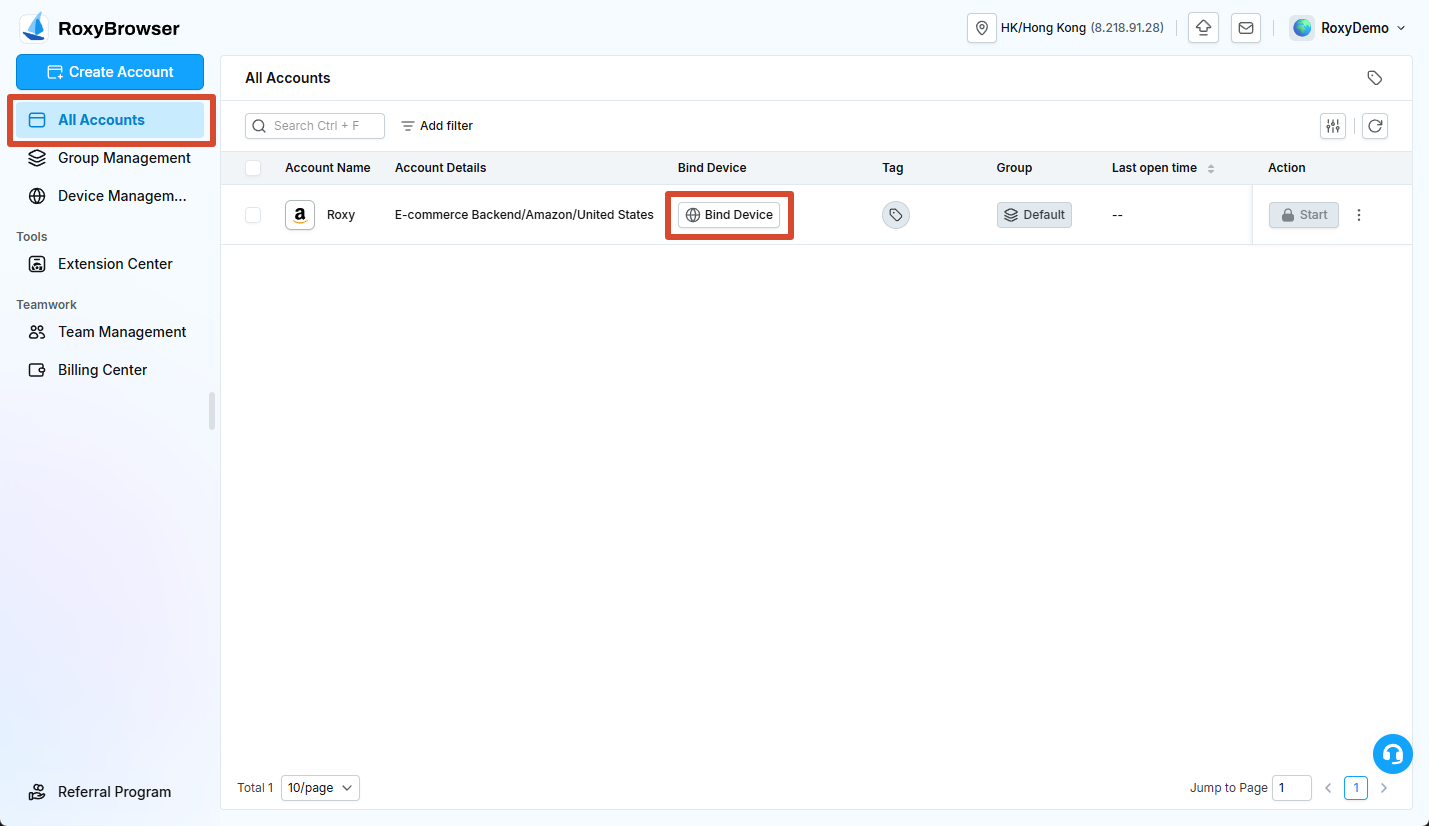
- Select a device that has already been added and successfully tested.
- Confirm that its country or region and outbound IP match the business requirement.
- Click Confirm Binding.
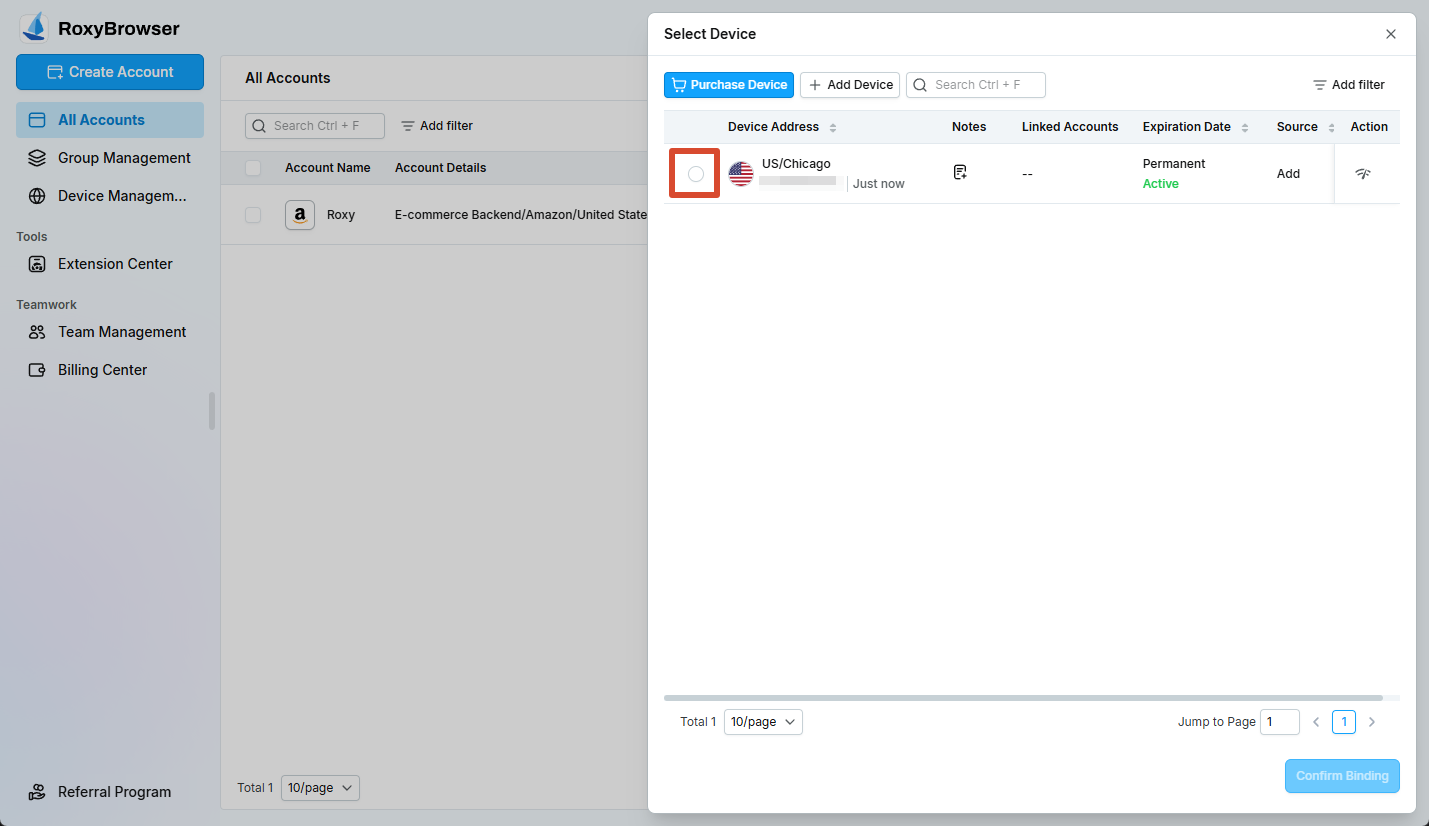
If no devices are listed, open Device Management and add an existing IPv4 or IPv6 resource, or purchase a device when that option is available to your account.
WARNING
Use a stable, independent outbound IP for important shops. Before changing a device, check the new IP's location and risk level and follow the target platform's account policies.
Step 4: Start the Account
After a device is bound, Start becomes available. Click it to open the account's independent browser environment.
If Open Workbench is enabled in account preferences, or set to follow the enabled software setting, the workbench page opens at the same time.
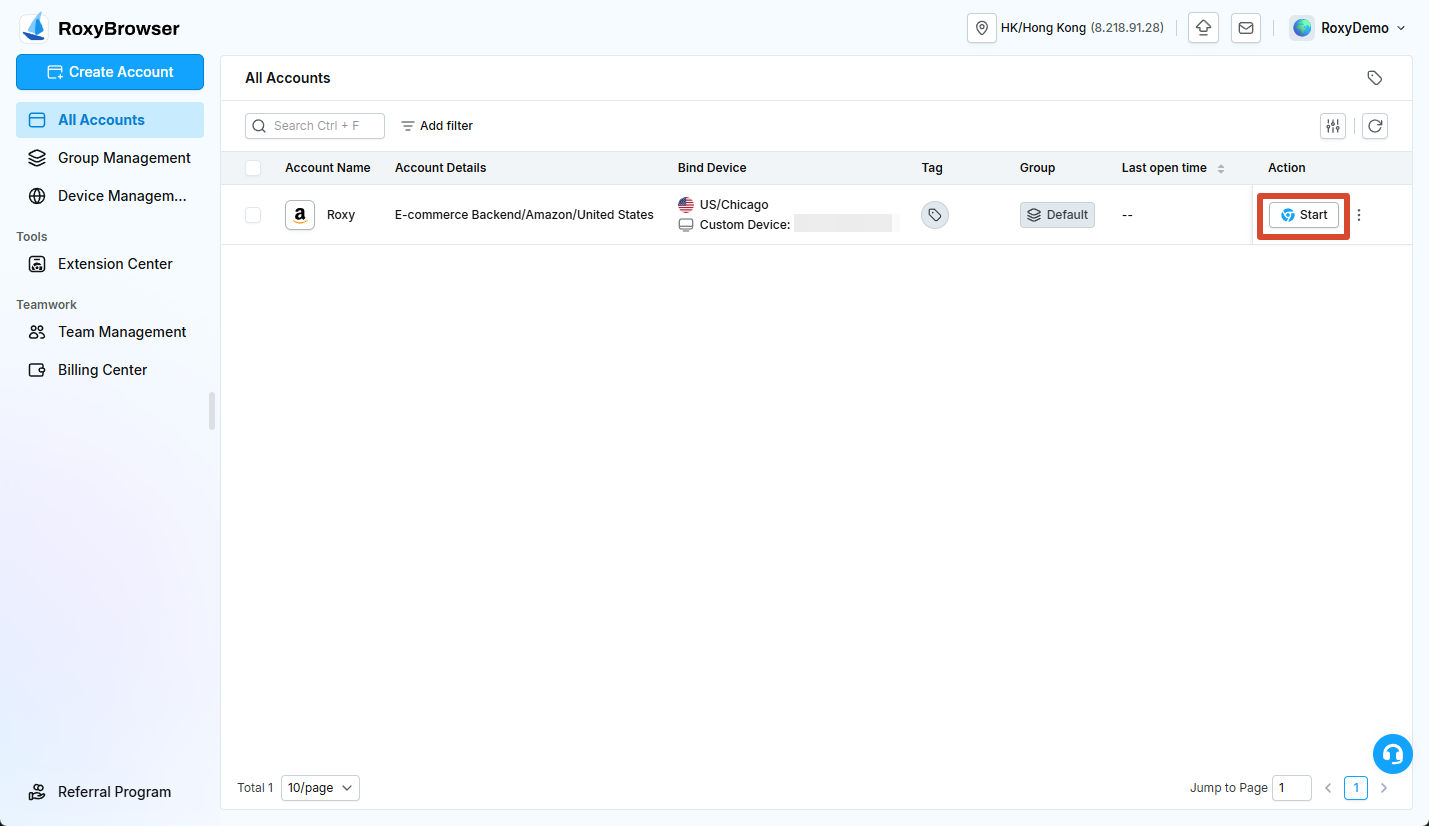
After the first start, sign in to the target platform and verify the page, time zone, language, and network location before beginning production work.